Usage
Since CoRD was originally designed for use in a cluster computing environment, the initial way we present here for using it is through a command-line interface. If a GUI would be helpful, please tell us by creating a new issue on GitHub.
Currently there are two things you can do using cord.
- Run a coupled RipCAS-DFLOW model
- Post the outputs of the RipCAS-DFLOW model to HydroShare
HydroShare is a nice web app for storing, sharing, and publishing data. It also provides a Python API that we use internally with CoRD. If you want to be able to push data to HydroShare you’ll have to sign up for a HydroShare account.
We offer two different options for running a coupled RipCAS-DFLOW model: the first is Run a coupled model with config file parameters and the second is Use the interactive command to run CoRD where the user can either enter required information as command-line options or CoRD will prompt them as necessary. The following guide introduces the three commands for the two methods of running RipCAS-DFLOW and posting data to HydroShare.
Quick Reference Guide
If you are using CoRD and want to see the built-in help you can run
cord
Which will print the help
Usage: cord [OPTIONS] COMMAND [ARGS]

    Options:
      --debug
      --logfile TEXT
      --help          Show this message and exit.

    Commands:
      from_config  Run CoRD with params from <config_file>
      interactive  Run CoRD interactively or with options
      post_hs      Post the model run data to HydroShare
Quick note on the –logfile option
The most important option to note here is the ability to set the logfile. If you
don’t set the logfile, it will automatically be set to the full
data_directory path with slashes replaced with dashes with extension
.log. This can be pretty ugly if you are working with many modelruns at
once. This option works with the from_config and interactive commands.
There is no log file generated
Help for individual commands
You can also get help messages for individual commands. For example, to get help
on the post-to-HydroShare command, post_hs you could type
cord post_hs --help
and get this help message
Usage: cord post_hs [OPTIONS]

  Post the model run data to HydroShare

Options:
  --username TEXT
  --password TEXT
  --modelrun-dir TEXT
  --include-shear-nc BOOLEAN
  --resource-title TEXT
  -k, --keyword TEXT
  --help                      Show this message and exit.
Run a coupled model with config file parameters
DFLOW has users provide a configuration file for providing the locations of
input files, specify parameters, and so on. In that spirit, we allow users to
specify these sorts of things in a configuration file. Below is the
configuration template file, which
can also be downloaded here.
# Default configuration file; customize as necessary.
#
# To enable syncing with HydroShare, set SYNC_HYDROSHARE to "True" and
# add your HydroShare login info.

[General]
DATA_DIR = debug_data_dir  # must create the directory before running
INITIAL_VEGETATION_MAP = data/ripcas_inputs/vegclass_2z.asc
VEGZONE_MAP = data/ripcas_inputs/zonemap_2z.asc
RIPCAS_REQUIRED_DATA = data/ripcas_inputs/ripcas-data-requirements.xlsx
PEAK_FLOWS_FILE = data/peak.txt
GEOMETRY_FILE = data/dflow_inputs/DBC_geometry.xyz
STREAMBED_ROUGHNESS = 0.04
STREAMBED_SLOPE = 0.001
#
# python import style, e.g. my_dflow_module.my_dflow_fun
# defaults to a function that calls qsub dflow_mpi.pbs
DFLOW_RUN_FUN =
# will default to the data_dir with dashes replacing slashes if blank
LOG_F =
This lists all the files and parameters that are required for running CoRD.
We explain all of these below, but first we will show how to run CoRD with a
config file and then in the next section we show the equivalent command using
the interactive command.
Once we have our configuration file ready and saved to
/path/to/myconfig.conf, for example, run CoRD by running
cord from_config /path/to/myconfig.conf
Use the interactive command to run CoRD
This command is called “interactive” because if not all files and parameters are
specified as options, CoRD will prompt the user for the values. Here is an
example of the same command run using the from_config command above, but
with all options specified. Note that the directory passed to --data-dir
must exist.
cord interactive \
    --data-dir=debug_data_dir \
    --initial-veg_map=data/ripcas_inputs/vegclass_2z.asc \
    --vegzone-map=data/ripcas_inputs/zonemap_2z.asc \
    --ripcas-required-data=data/ripcas_inputs/ripcas-data-requirements.xlsx \
    --peak-flows-file=data/peak.txt \
    --geometry-file=data/dflow_inputs/DBC_geometry.xyz \
    --streambed-roughness=0.04 \
    --streambed-slope=0.001
Push your modelrun data to HydroShare
The push_hs command will zip related data and push three files to
HydroShare: input.zip, vegetation.zip, and shear.zip. You can
provide your credentials on the command line like so, or the command will prompt
you for your credentials.
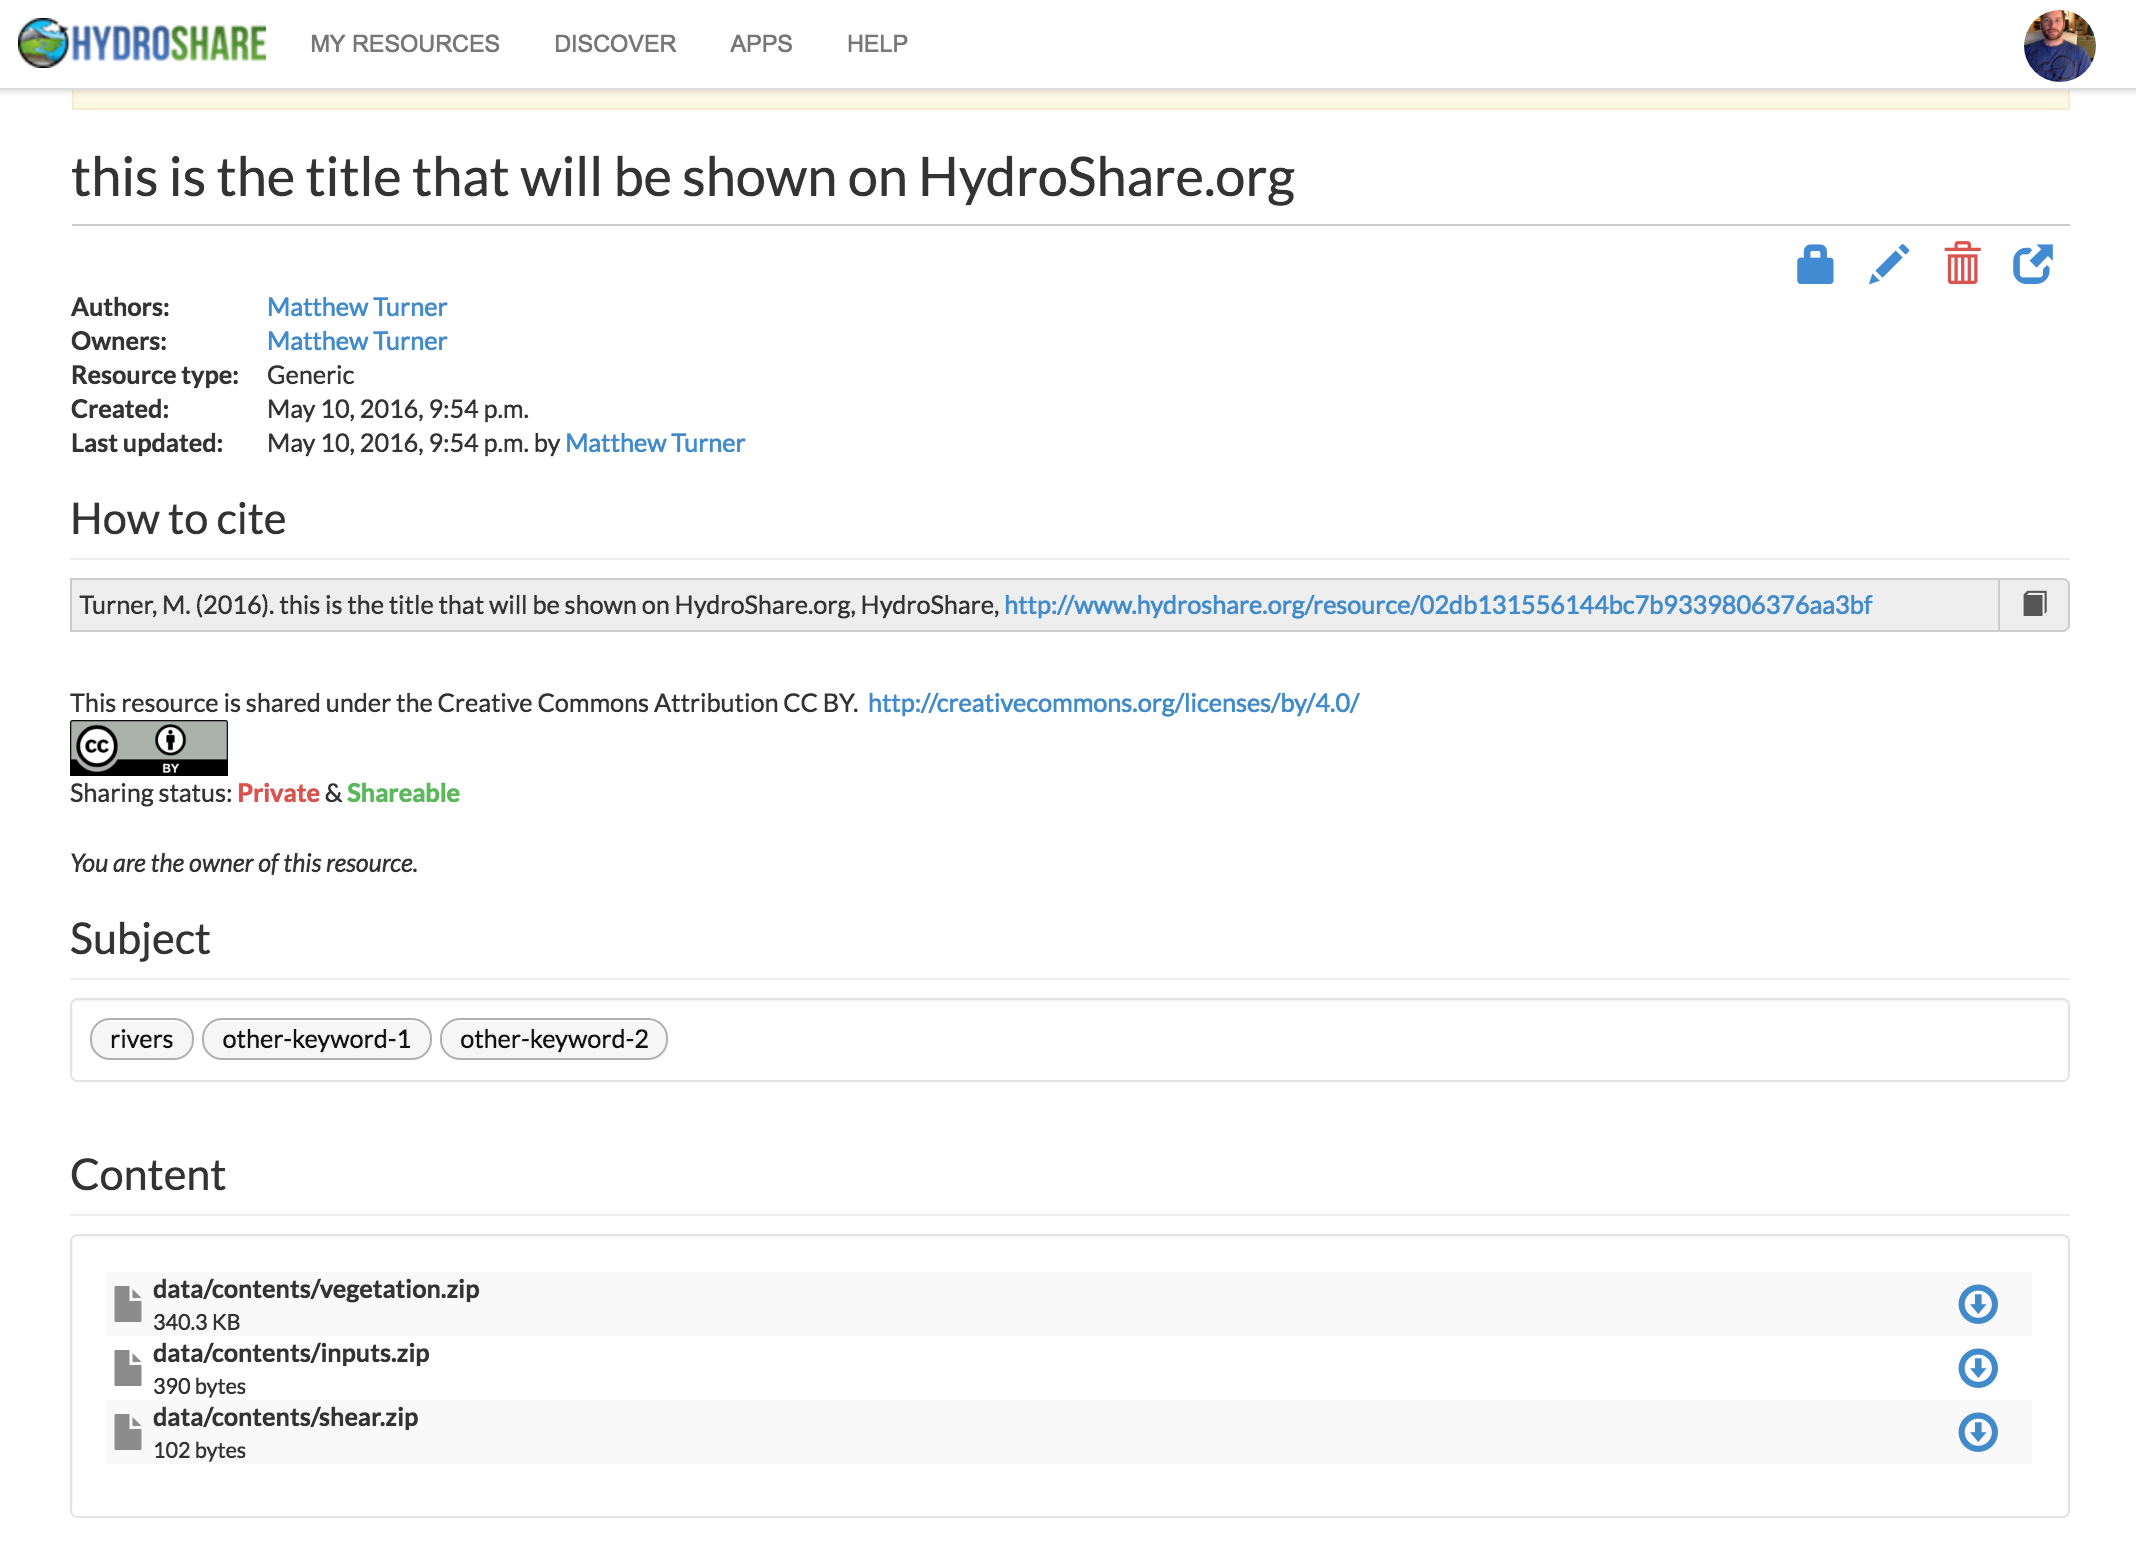
cord push_hs \
    --modelrun-dir=debug_data_dir \
    --username=your_hs_username \
    --password=your_hs_password \
    --resource-title='this is the title that will be shown on HydroShare.org' \
    -k rivers -k other-keyword-1 -k other-keyword-2
All these options should be self-explanatory. When submitting this to the HydroShare server, here is a screenshot of the resulting resource we created
When you start
a model run, all the input files and parameters you have specified are moved to
a folder called input under the data_dir you specified. This is straight
forward except for the streambed_roughness and streambed_slope: these
are put into a file called roughness_slope.txt
with two rows that would look like this for the example above
roughness    slope
0.04         0.001
Every timestep creates two directories, dflow-{timestep} and
ripcas-{timestep}. The dflow directory contains everything required to
do an individual DFLOW run, including the four boundary condition files,
the mesh file (which has _net in the name), the .pbs file which is used
to submit the job to the CARC scheduler, the .mdu and .ext files which
are config files used by DFLOW, and the output, both in the original netCDF
format in the DFM_OUTPUT subdirectory and the converted-to-ESRI ascii
version, shear_out.asc. The ripcas directories contain only the output
vegetation file, vegetation.asc. Before pushing the data to HydroShare,
push_hs creates the three zip files, input.zip, vegetation.zip, and shear.zip,
then pushes those to HydroShare. When you download those outputs from
HydroShare and unzip the vegetation.zip and shear.zip, there will be a
series of sequentially numbered outputs, vegetation-0.asc,
vegetation-1.asc, ..., and shear-0.asc, shear-1.asc, and so on.
So, after a modelrun has completed, you will have, with the
--data-dir you specified as the base directory, the following output
directory structure:
data-dir/
|
-- inputs/
    -- peak_flows.txt
    -- DBC_geometry.txt
    -- ripcas-required-data.txt
    -- roughness_slope.txt (small TSV file with roughness & slope info)
    -- vegclass_2z.asc
    -- zonemap_2z.asc
|
-- dflow-0/
    -- shear_out.asc
    -- (... other DFLOW files)
|
-- ripcas-0/
    -- vegetation.asc
|
-- dflow-1
    -- shear_out.asc
    -- (.. other DFLOW files)
|
-- ripcas-1/
   -- vegetation.asc

...

|
-- dflow-{N-1}/
-- ripcas-{N-1}/
Where N is the number of peak flows in the --peak-flows file. push_hs
takes this unwieldy output and puts it in something more manageable. Plus, it
stores the model run outputs with metadata in a way that can be easily shared
when you are ready to publish your paper that used this data.